1. A digital camera that allows you to set exposure manually.
2. A sturdy tripod.
3. A subject (i.e., what you're taking the picture of) that does not move.
4. A computer with Photoshop CS2 installed.
If you have a camera that supports it, it also helps to have a "cable release", which is basically a little shutter button that attaches to your camera via a wire, so when you push the button to take the picture, you don't nudge the camera at all.
First off, you need to take the photographs. Because you are attempting to create a high-dynamic-range image, it makes a very good deal of sense for you to set your camera so that it shoots your photographs in your camera's RAW mode. The reason for this is that the RAW format captures more dynamic range data than is available in the alternative, the JPEG file. It also gives you a great deal of color temperature latitude -- you can set the color temperature of all of your photos very easily after the fact. You also need to set the camera to manual exposure mode. Tripod your camera so that it doesn't move, then compose the scene you want to shoot. Note that, like long-exposure photography, HDR works best when your subject isn't moving. Also, if your camera has a changeable ISO setting (most do), set it as low as possible to avoid noise. Meter your scene. Select the aperature you wish. The object here is to bracket your photos (i.e., take a photo of the same scene several times with different shutter speeds), either automatically or manually. Some high-end cameras bracket automatically, some don't. It's important that you change the shutter speed, NOT the aperature -- the reason being that since you will be combining several images to make one, you don't want your DOF to change between shots. Once you have your scene set, your camera set and tripoded, and your settings set -- take your pictures. I personally usually like to take quite a few photos over the range -- for example, I'll take photos at -6EV, -4EV, -2EV, metered EV, +2EV, +4EV, and +6EV. That may seem like a bit much, but going overboard doesn't hurt anything and gives you more latitude in toning. However, you can get by with less, as I have in the below example:
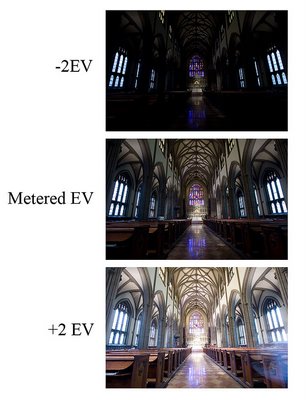
Okay, so you have your three (or more) photos! Transfer them from your camera onto your computer. Done? Done. Now, how do you take those three photos and create a new, magical HDR image? Simple.
First, find your three photos either using Windows explorer or the Adobe Bridge program that comes with CS2.
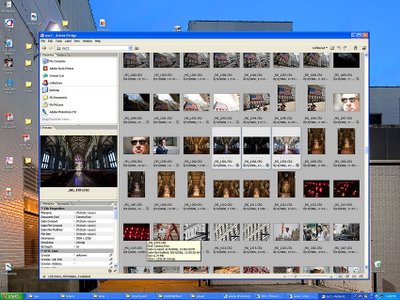
Highlight them, and open them with Photoshop at the same time by dragging them into Photoshop.
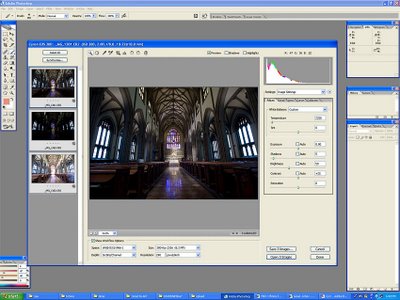
Okay, you've got it open. The important things to do here are to
A: make sure that all three photos are the same color temperture and tint
B: make sure that you turn off ALL the automatic checkboxes.
You can pick any color temperature you think looks like what you saw -- the important thing is that they're all the same. Done? Now click "Done". By clicking done, you are telling Photoshop to remember these settings -- which is important, because in a moment you're going to have Photoshop automatically open all of these photos up again.
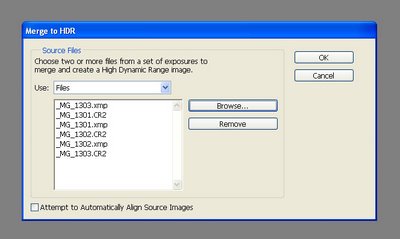
Okay, now to make the HDR. Go into the File menu, then the Automate submenu, then select "Merge to HDR":
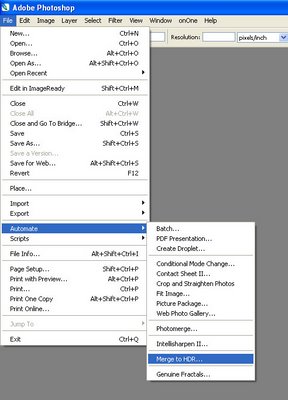
In the dialog box the pops up, select the files you want to use to make the HDR. Do not check the "Align automatically" box, unless you screwed up your tripoding and moved the camera between photos. The automatic alignment feature doesn't usually work so great, so it's really a last resort.
You will end up with a preview window that shows you a preview of your HDR that looks like this:
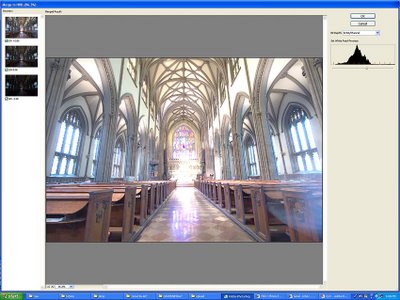
Just click okay -- you don't need to adjust the histogram up there at all, all that effects is the preview, it has no effect on the final image. (*edit*, okay, it DOES affect the baseline for the curves in the next step but for all practical purposes it doesn't matter for what we're trying to do. Thanks to Adobe for pointing this out to me.) After a loooong while (or a short while if you have a fast computer and a lot of RAM), it'll finish and show you your new HDR image. Cool! You can save this file if you want; it's a 32 bit image file that contains all the exposure data from all of your shots. Doesn't look like much, but that's because you don't have an HDR monitor. One day, HDR monitors will be commonplace -- so keep that file handy. :)
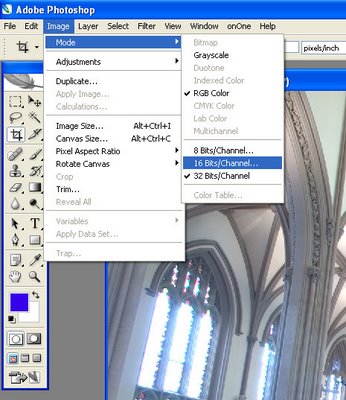
But wait, we're not done yet! We want the photo to look good on our monitor. How do we do that? Easy, we downsample. Go to the Image menu, the mode submenu, and select "16 bits per channel".
You end up with a new menu. Toggle the Histogram arrow at the bottom to show the histogram. Go into the little menu at to and select "Local Adaptation":
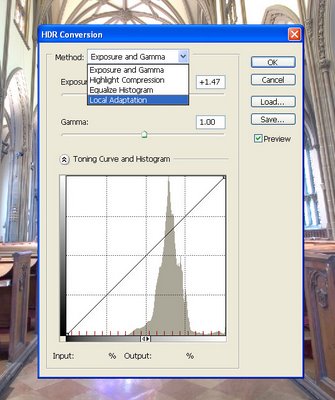
Click OK. Whoa! Crazy, huh? Doesn't look so great, most likely. This is just the preview window, though, showing you what it will probably look like when Photoshop is done converting it. The first thing you need to do is bring the left hand side of the histogram to the beginning of the shadows information, as shown below:
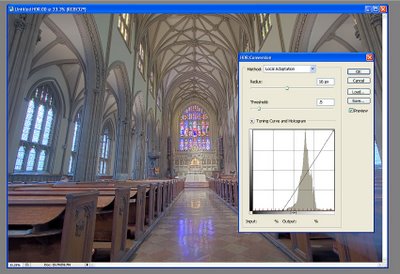
Okay, cool! Looks better. Now work the curves until you're happy. If you don't know how to use curves in Photoshop, wikipedia or a search engine is your friend. :) Here's what I did to this one:
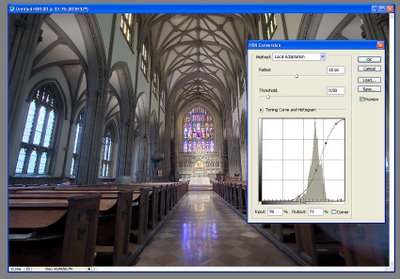
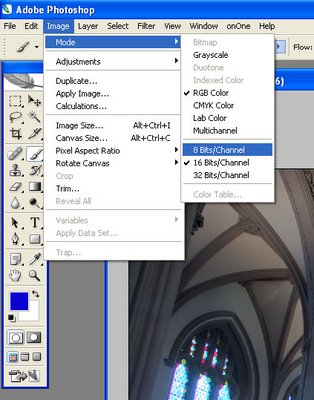
When you're done, click okay. After a little while, viola! You get a nice 16 bit image. Tone this to your taste using whatever toning tools you know. Save it as a 16bit TIFF file, if you like. However, when you're done, you need to downconvert it to 8-bit in order to save it as a JPEG. Go to the Image menu, the mode submenu, and select "8 bits per channel".
Viola^H^H^H^H^H Voila, the finished product has arrived!
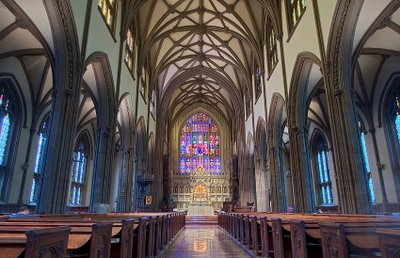
Save it as a Jpeg and you're done. See, not too hard -- and it's a great new world of photography to explore.
Niciun comentariu:
Trimiteți un comentariu